
Showing posts with label art projects. Show all posts
Showing posts with label art projects. Show all posts
March 22, 2013
Day 81
March 18, 2013
Day 78-79

The 2nd image is another avatar that I haven't used yet. It is of a necklace I made for a competition that required you to have your display for sale. I made this for myself, so I didn't want to part with it. It's made using jet black & amber jade which is the perfect accents for the focal element.
 The avatar I use everyday, which is posted at places, such as Facebook, my ning groups, photography groups, etc. will be shown next week for the self-portrait challenge, because I can relate to it more than the ones shown here.
Reflecting on these two avatars, I noticed they are jewelry related which is insane because I rarely wear jewelry other than earrings and a wedding band. I did say these were alter egos! I hoard vintage jewelry with the plans to recycle them into something more stunning. Some day...
February 26, 2013
Day 57-58


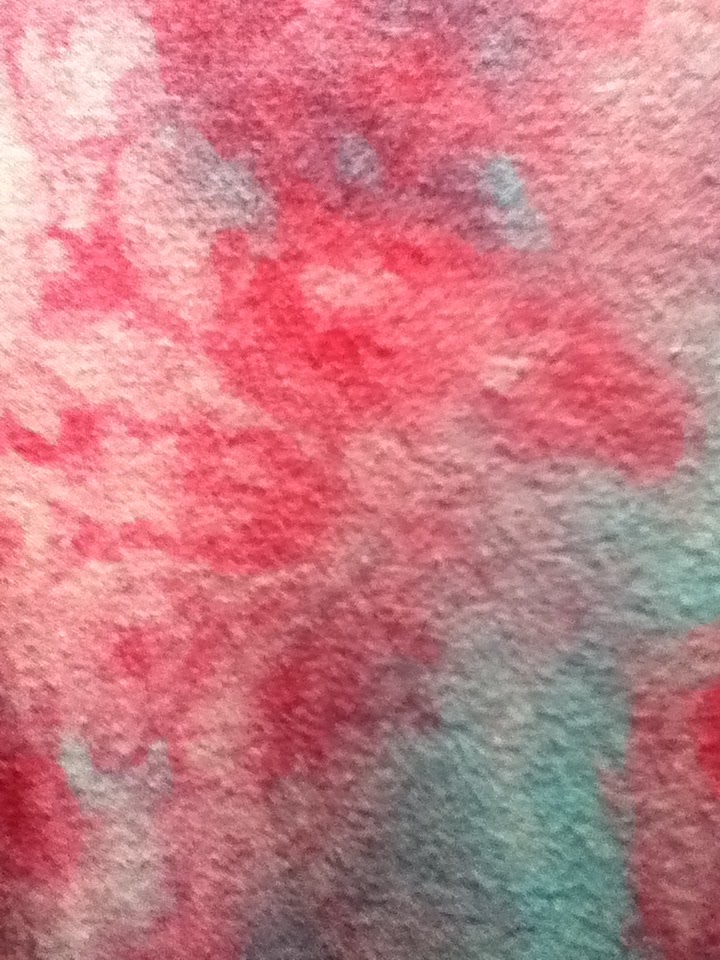
I have something new for you today, several layouts of a color palette I got from Milliande. I am trying to come up with some unique ways to present the colors in a custom palette. Here are a few of my current samples I made earlier today. I'm not sure which one is my favorite, maybe this 2nd one which I used a paint drip brush to apply the color, but I like the grunginess of the 1st one. It was made from grungy borders and the 3rd one is made from coffee stain brushes. I like them all and will keep working with new ways to present the color palettes because I get tired of seeing the same things over and over again. Maybe a variety is the best way to go. :-D
February 25, 2013
Day 54 & 55

Whenever I come across some interesting ideas, patterns or designs, I like to try creating hand-carved stamps with them. Here are two tags I made with some of the carvings I did awhile ago. One of my personal symbols is the circle, thus carving a stamp using this pattern was a challenge. I wanted the circles close together, in their own pattern in a grungy style. The doodle circles were done after the stamp was printed.
The blue stamped image below was done on an eraser I picked up at the $ store. I think there were 4 per package and soft enough to carve a stamp easily enough. My goal with this carvings was to create some scratch grungy texture and when this printed out I loved it. Reminds me of the masts of a sailing ship with the waves of the ocean crashing on the shore in the moonlight. I need to make some everyday greeting cards with these images and of course, carve some more!

February 19, 2013
Day 50
My friend Cecilia has a new line of stencils now available at: Stencilgirl I noticed several other artists also have featured designs available. I hope you will check them out!


February 14, 2013
Day 45

This image looks like Barbie-but it's actually the close up of a mannequin that may have been fashioned after the famous Barbie. I used the photo to create a stencil of which I drew the image onto a large sheet of watercolor paper. Once I had the image drawn, I had to decide which areas I wanted to remain white. The white areas are what set this whole process off and make it surreal. With a masking fluid, I painted out all the areas that were to remain white. Then the real fun began. Pouring watercolors! For years I have wanted to try this technique and I will again because I love it! It is Jean Grastorf's DVD: "Pouring Transparent Watercolor" that gave me the inspiration to try this technique. I struggled to find just the right image that would work and I am struggling to find another one, but this worked well enough for my purposes. After all, it was just an experiment. I did follow up with painting in some solid black areas, which made this whole thing pop as much as the white did. But, then I took a photo of the painting and ran it through,....that's right.....Apps! Just a couple this time and I am very pleased with this final effect. She's beautiful and needs to be framed.
February 13, 2013
Day 44

January 29, 2013
Day 31

 A few years ago Sherre H and I conducted several digital workshops and one of these techniques was to create these circles of color on an image. Using the image again, I ran it through PhotoForge2, DXP and Pic Grunge apps to develop this digital piece.
 I added a textured background of some beautiful felting I had done on some organza fabric which was sewn to the back of my denim jacket. The texture has some beautiful gold glitter swirls, purples and dark blue colors.
For yet another texture, (not shown) I layered a peeling paint texture that I had recolored using yet another app. Sometimes I run the images and layers through so many apps I just can't remember them all. It's addicting and it's fun. A great way to kill a few minutes while waiting in line or a few hours when you're not feeling well and taking a day off.
I started my journey of iphoneography by downloading some of the freebies from itunes to my ipod, then joined a few of the iphoneography groups. From there I would view other layouts and see which apps were used. If I liked the layout, I would research the app at the apple store. If it was compatible and I didn't already have an app that would do the same thing, I would consider making a purchase. Having a $$ limit is a good thing! I try to limit my purchases to $5 which will get me 3-5 apps to play with. Not a bad investment, nor an expensive one. Figuring out how to load images to the ipod via photo stream wasn't easy, but once I did this, I have been sorting my photo files to see which images I want to play with.
I'm also going to be working on some new digital kits, so I hope to share some previews with you soon.
January 28, 2013
Day 30

January 25, 2013
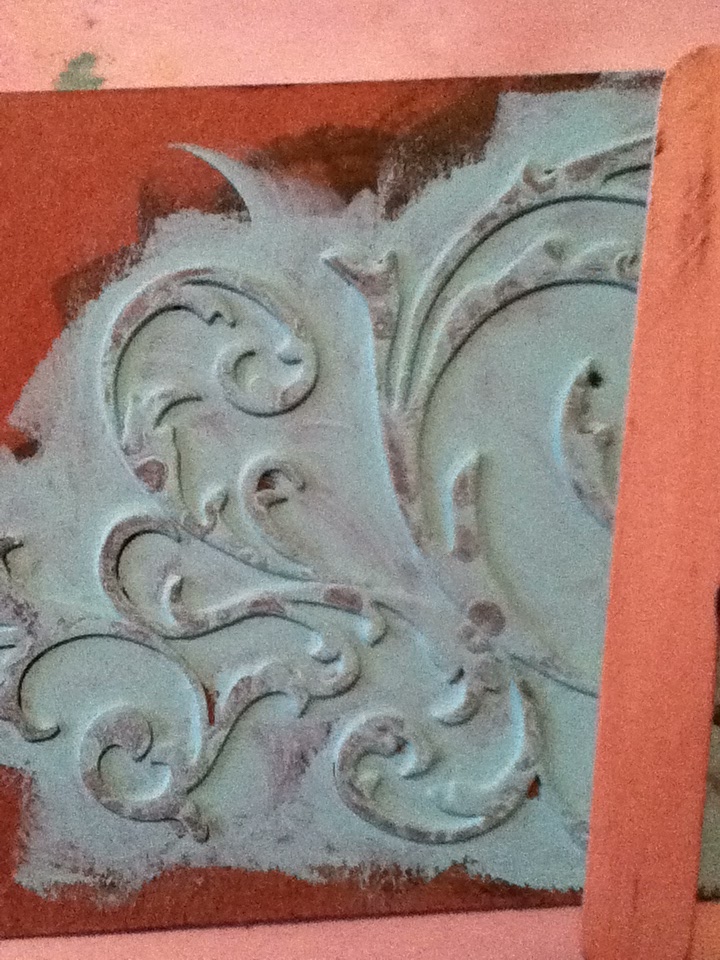
Day 26

I taught a digital collage workshop a couple of years ago and this was created for that workshop. It's called "Turned to Stone" and was made digitally using a steampunk style of layering various "Hardware" pieces to a stone statue. A fun piece to create and the only steampunk I've done. It's a great culture to explore and there are many awesome artists out there who do this style exclusively. I can't do anything exclusively-I have to be able to spread my wings and explore everything that comes along. I love new things to try out in my studio and my digital software. Thus, I am currently enjoying the iphoneography apps but not exclusively. :-D I also enjoy my point and shoot camera and my DSLR. I recently learned how to use my ipod to take better photos and altering them with the apps, but the Kindle Fire, while very limited, can do the same. Trying to share images between all the resources (different devices) has been a real challenge since Kindle absolutely refuses to log into the Apple store, but of course, Amazon sells apps too and doesn't want to share the customer base. But, there's always a work around. Now to find an affordable ipad! :-D
January 24, 2013
Day 24

January 20, 2013
Day 21


 My GD told me yesterday morning, that she liked days when she could make art in her jammies. We were making these Valentine Day Cards for her Mom, Dad, family and Best Friends. We always try and make some sort of art project(s) when her & her brother are spending the weekend with us. I think it's important the kids have the opportunity to use their imaginations and creativity often. Exposing them to arts & crafts early is a good thing for them and I get to bond with my grandkids over fun projects.
I hope they will always want to make art with Grandma, or at least pursue the arts as they get older. We can't always predict what the future holds for any of us, but I hope as my grandkids get older, they will want to continue our traditions.
January 18, 2013
Day 19

This photo conversion is the first one in my new color series. Created last month from a photo I took a few years ago while on a road trip up to Idaho. We stopped at a small town museum for a quick photo shot. This was one of my favorite photos taken during the week long trip. My advice to anyone who enjoys photography-get out and explore those little towns-they have some much to offer the photographer! Or take a day trip to your local downtown area to explore the arts district!
January 16, 2013
Day 15

January 8, 2013
Day 10

see-through plastic ones, so decided to recycle the chipboard. (I hoard this stuff because it can be used for so many things!) These pieces will be recycled into new journal covers and used to create a variety of shaped journals. Shapes are even more fun to make and easy when using the custom shape tools in the digital software. This time I will be using up a variety of vintage papers that have been waiting years to be used in a project. The hoarding must end! Use it up or give it away! Another goal I did not achieve last year, or the year before, but I have high hopes for this year to be successful in downsizing! :-D
Day 9-Textures


January 4, 2013
Day 3 of 365

Dan has written another e-book as well, but it is only for the ipad. If you have an ipad, the e-book is called "App Alchemy".
January 2, 2013
At a Cross Road


I really like the looks of the darker image. The person seems to be further back into the painting. I think I'm ready to continue now and I'll just have to be brave. If it doesn't work, oh well. I do have gesso.
Allowing myself the freedom to proceed, even with possible failure, is going to open my mind to other possibilities.
Subscribe to:
Comments (Atom)